G CHORD, STRUMMING, AND IMPROVISATION EXERCISE
Lesson 4
Teaching Artist: Juan Manuel Trujillo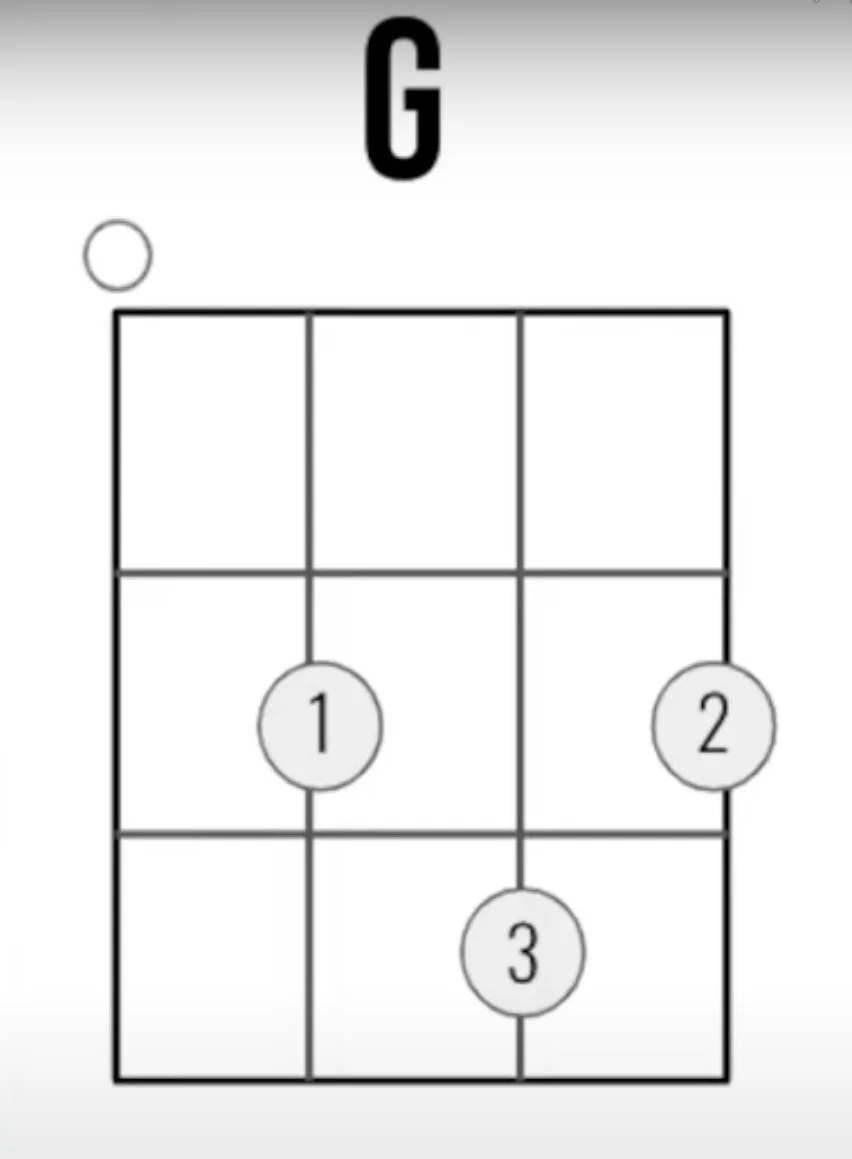
SUMMARY
This is the fourth lesson from the Strumming Through The Americas ukulele course. Students will learn their second chord, G, and implement a new strumming rhythm incorporating an upstroke. Then students will engage in an improvisation activity that uses two chords to create a song.
OBJECTIVE
Students will be able to interpret a G chord diagram.
Students will be able to incorporate the upstroke to create a strumming pattern.
Students will be able to integrate the strumming pattern with changes between C and G chords.
Students will be able to arrange a chord progression by improvising the lengths between two chords.
MATERIALS
Ukulele
Google Slides: G Chord, Strumming and Improvisation Exercise
Adaptive tools or chord changers for students with disabilities
EXPLORE
Display the Google Slides: G Chord, Strumming and Improvisation Exercise. Explain to students that while “La Pisada” has only one chord, many songs use two or more chords, played one after the other.
Engage students in a listening and viewing session. Play the video of “Something” on Ukulele, stopping the video around 1:30. Students will see Paul McCartney playing the George Harrison classic using a ukulele. Explain that while this song was not originally performed on the ukulele, we can adapt all kinds of songs for the instrument. Ask: Can you hear the ukulele playing more than one chord in this song? Mention that ukulele can be played with other instruments, as seen in the video.
Tell students that they will learn a second chord and strumming pattern during an exciting activity.
LEARN
Play The G Chord video. Note that this chord is more challenging than C major. Pause the video at 0:32 to display the chord diagram. Allow students time to learn the chord shape and correct finger placement. On strings for the left hand, remind students to place their fingers below the nail tip but before the flat of the finger. Practice this chord and support students as needed.
Play the Second Strumming Pattern video and pause at 0:49 to allow students time to practice integrating the up and down strums with the C chord. Model the pattern, drawing attention to a soft approach that pushes through the strings, rather than pulling them up or pressing them in.
Resume the video from 0:49. Students will apply the second strumming rhythm to the G chord. After they learn this rhythm, students can incorporate the instructions from the end of the video and practice the strumming pattern, moving between the C and G chords.
PERFORM+SHARE
Show the Improvisation Exercise video. This video has a brief explanation of the exercise until 0:48. A backing rhythm track will play for the remainder of the video, providing an opportunity for students to create their own arrangements of the C and G chords.
Allow students time to practice with the track, as needed. If students need support, explain that they can leave a four beat rest between chords. This will allow time to transition musically, while still keeping the beat with the track.
Create a video with the backing track portion of the video playing. Invite individual students to take turns playing their new arrangements.
Share your musical creations at S’Cool Sounds Padlet.